Showing posts with label craft. Show all posts

DIY: Fun Science grow your own crystal monsters

Using capillary action a cardboard cut out sitting in a saturated solution of dissolved crystals can create some amazing creatures! 
You can buy kits to do this, but why not make your own?

[CAUTION: do take care when doing this, supervise children, do not eat this stuff, and as with all things you will find other ways to do this, better ways to do this, and cheaper ways to do this.. this is just how I do it]

I have photographed my monster as he grew ... I have used commercial head and leg cardboard cutouts available from the Colorific Mutant Monster kits, as I didn't have time to make my own. You can make your own easily, just use lightweight card so it doesn't weigh the end product down!


What you need


Sodium Chloride (as table salt)
Food colouring
Thick blotting paper 
Laundry Blue (its that stuff you get in the cleaning aisle of the supermarket to make whites....white)
Ammonia (again in the cleaning aisle)
Small dish or tray
Warm water


Method

Cut your shape/s from the blotting paper. I  replicated the design from the Monster kit as I loved that kit so much I wanted to make it again! I secured the blotting paper body and monster features with staples. The original kit has slots in it to secure the monster body and features, my replica was not as clever!

Dip the blotting paper into food colouring, I used yellow (as the original kit was yellow, and again I wanted to replicate this as I liked how it looked) but you can use a rainbow effect.. whatever works for you!

Mix 2 tablespoons of warm water with 2 tablespoons of salt, 2 tablespoons laundry blue, and 2 tablespoons of ammonia.
(Ammonia is used to speed the evaporation process, you can leave this out it won't alter the finished product, it will just take longer to work)

Mix well: the salt needs to dissolve to create a saturated solution

Carefully pour the solution into the tray or dish and place your cardboard monster on top.
Assembled and ready for the crystal solution
As the solution is drawn up the cardboard and the water and ammonia evaporate, you are left with crystals coloured by the food coluring growing on the cardboard!!


after one hour
After five hours

It can take a few hours for you to start seeing any of the crystals and around 12 - 24 hours for it to get to its full crystal capacity!!
If the crystals break off, just put them back into the tray and add some warm water, the capillary effect will cause these to again be drawn up and new crystals will form.
After 24 hours (thankyou to my colleague Jo for this photo of my monster that she has named 'Popcorn Man'
Cardboard contains cellulose and it is the capillary action of this that draws the solution up. The crystals form as the liquid evaporates.

Sodium Chloride makes quite compact crystals, if you use Magnesium Sulfate (Epsom Salts) you will get elongated crystals. Epsom salts are great for making faux snowflake crystals!

I would love to see what you do with this!
..


............................................................................................................. Please visit me on etsy! www.etsy.com/shop/empressbat handcrafted gothic goodies at bargain prices. see me on etsy! www.etsy.com/shop/empressbat ...Please visit me on etsy! www.etsy.com/shop/empressbat handcrafted gothic goodies at bargain prices. see me on etsy! www.etsy.com/shop/empressbat

DIY: crochet snowflakes

It is heading for Winter here, and although winters where I live never get much colder than -1 degrees celcius, and some morning frost, I decided to be creative with a winter theme.

cue crochet snowflakes
I made this one in cream coloured 8ply acrylic
I learned how to crochet when I was very young, around 3 or 4 years old, and I find it quite easy to do. The trouble is I am not that good with understanding crochet patterns, I always find them convoluted and complex. I find it easier to make stuff up as I go along, or revise a pre-written pattern into one that works for me.

I have been fiddling around with an easy to make crochet snowflake, after success making one out of variegated blue 8ply acrylic yarn I thought I would share it with all of you! 

what i did:
using a 3.5 hook and 8ply yarn chain 6 and slip stitch to join
chain 4, then treble 11 into the hole
slip stitch the end of the row of trebles to the start

  • *chain 5, then double crochet (dc) in the 4th chain from hook
  • chain 5, dc in the 4th chain from hook
  • then dc again near the top of the trebles
  • and one more dc in the next treble*

repeat from * 5 more times

then slip stitch to finish, darn in edges

et voila

if you use sparkly yarn it will look even nicer!

this one was made in variegated blue 8ply acrylic


______________________________________________________________________________ 

About Me: I work full time, I am also studying for a therapist qualification in Naturopathy specialising in Herbalism, I have a small craft 'business', I am co-admin of an auction page on facebook to help other small hobby businesses, i maintain my own 'store' facebook page, I blog at least once a week and I maintain a facebook page created to support small home businesses and hobby sellers 
............................................................................................................... ............................................................................................................... Please visit me on etsy! www.etsy.com/shop/empressbat handcrafted gothic goodies at bargain prices. see me on etsy! www.etsy.com/shop/empressbat ...Please visit me on etsy! www.etsy.com/shop/empressbat handcrafted gothic goodies at bargain prices. see me on etsy! www.etsy.com/shop/empressbat

DIY: Easy Fabric Bunting

A few days ago, a friend of mine who has a market stall called Wytchway  was asking on facebook about where she could buy some waterproof fabric bunting to decorate her stall. 

If you are in the Dayboro Queensland area and interested in Wytchway's stall or to purchase from her online please have a look at the information on her facebook page.


I decided to attempt to make some bunting.
Just to see if I could.

Step 1

Created a template out of cardboard for the size and shape I wanted, allowing for the hem (to feed the string through)
cardboard template

Step 2

Drew around the template on the fabric and then hand lettered the 'WYTCHWAY' with a fabric ink pen

Step 3

Ironed fabric and then placed the clear fabric plastic coat stuff on it, covered it with baking paper and ironed on a low setting

Step 4

I cut out the triangles with sharp pinking shears (keeping my fingers well out of the way for fear I would end up with pinking shaped abrasions on my hands!)

I then sewed around them and sewed the hem in which the jute would go to string the bunting

Step 5

After each triangle was sewn I then threaded them with the jute to form the bunting. After all triangles were on the jute I pushed them closer together and did a zig zag stictch over the hems and the inserted jute.

I then went over each letter adding embellishment in the form of gold paint pen shading. (yes I AM ambidextrous which is why the top photo shows me writing with my right hand and this photo is my left hand)


The bunting is ready to hang!

My sewing machine is old and falling apart, i cant afford a new one at the moment, so it kept breaking the cotton. I think if my sewing machine worked properly i could have made this bunting so much faster, and with less expletives.

Remember this one is only a prototype. So excuse it looking a bit dodgy!

I think these could be improved if a stiffener was used such as stitching the triangles onto acrylic felt, or ironing interface on the back.

VERDICT: easy to make, so give it a go!


For teeny bunting, use washi tape and twine!
____________________ 

About Me: I work full time, I am also studying for a therapist qualification in Naturopathy specialising in Herbalism, I have a small craft 'business', I am co-admin of an auction page on facebook to help other small hobby businesses, i maintain my own 'store' facebook page, I blog at least once a week and I maintain a facebook page created to support small home businesses and hobby sellers 
............................................................................................................... ............................................................................................................... Please visit me on etsy! www.etsy.com/shop/empressbat handcrafted gothic goodies at bargain prices. see me on etsy! www.etsy.com/shop/empressbat ...Please visit me on etsy! www.etsy.com/shop/empressbat handcrafted gothic goodies at bargain prices. see me on etsy! www.etsy.com/shop/empressbat

Washi Tape Wonders: things to make with washi tape

I really like washi tape. 

If you have read my blogpost about decorating wooden pegs, or my post about setting up my filofax you will see references to the tape and see how i have used it.

The tape comes in all sorts of colours and patterns, with a low level adhesive making it both decorative and useful.
For those yet to experience the wonders of washi tape, allow me to elucidate.

Washi tape is a type of decorative masking tape, traditionally made from rice paper, first created in Japan by the company Kamoi Kakoshi Co.Ltd. and sold as MT masking tape.  It dates back to 2006 when a group of artists approached the company with an art journal featuring illustrations created from masking tape.

Many companies make and sell versions of the original MT masking tape, and it is generically referred to as Washi Tape.

There are so many designs of washi tape to chose from; patterns, pictures, and solid colours in matte or metallic finishes.

The tape has a less sticky adhesive just like masking tape, so it is easy to remove if you have made an error in placement, or if you only want it stuck temporarily; the adhesive is however still strong enough to stay put on paper, envelopes, diaries, and all manner of things if you wish it to be a permanent decoration!

I use it as a temporary label on the plastic freezer containers I store left overs in. I stick a piece of washi tape on the lid and write a description of the container's contents on there. The washi tape remains on the lids in the freezer and only comes off when I peel it off prior to washing the containers up.


Tonight I just received a bulk order of Washi tape, and am experimenting with using it on metal pendant blanks to create novel pendants for costume jewellery. I will write about that in another day's post. Here is a sneak peak at a few I am working on. Two are using a cat themed washi tape from Chiyogami Designs, and the other is a postmark/letter themed washi tape I picked up a few years ago.
pendants with washi tape 
pendants with washi tape

I use washi tape in my filofax, on pegs to decorate them, and as I mentioned , I am also trying out what washi tape will look like on a pendant. It is great in scrapbooks and the less formal Smash books, as well as pretty on packages to decorate a gift!

I have a lot of washi tape but it isn't wasted, I use it for so many things!
some of my washi tape

There are so many uses for washi tape, I am still finding uses for it, and find it such a versatile craft supply.

In case you are looking for some lovely washi tape designs at very low prices, I buy most of my washi tape from Chiyogami Designs , they have an ebay store and I have always found them to be reliable and honest sellers, with an amazingly diverse range of washi tape as well as Japanese print origami paper.

Do you use washi tape?
What do you use it for?
Please feel free to comment.


____________________________________________________________________________ 

About Me: I work full time, I am also studying for a therapist qualification in Naturopathy specialising in Herbalism, I have a small craft 'business', I am co-admin of an auction page on facebook to help other small hobby businesses, i maintain my own 'store' facebook page, I blog at least once a week and I maintain a facebook page created to support small home businesses and hobby sellers 
............................................................................................................... ............................................................................................................... Please visit me on etsy! www.etsy.com/shop/empressbat handcrafted gothic goodies at bargain prices. see me on etsy! www.etsy.com/shop/empressbat ...Please visit me on etsy! www.etsy.com/shop/empressbat handcrafted gothic goodies at bargain prices. see me on etsy! www.etsy.com/shop/empressbat

Pegs as creative storage solutions: Part Four of the 'Organise and Beautify' saga

In my constant struggle to declutter and keep myself and the house organised, I have decided to be creative with storage. It is more a MUST do, rather than a 'oooh isn't this creative lets do it', due to the lack of spare cash in the household! 

The house is small, we need to use the walls as much as possible to stash things. Cash is limited so we need to use what we have to create a storage solution.

As I have been decluttering the house I noticed so many paper bits: receipts, bills to attend to, memos... lots of bits of paper that may not need long term storage but need to be in the forefront of my consciousness until they are actioned. 

I decided they could be stored on the walls, with clothes pegs. I haven't gone completely insane..yet.. my batlings, stay with me on this.

All i needed was a long piece of picture wire, some nice hooks, and some pegs. I have all those things so no need to buy anything extra here. 

The pegs looked a bit hohum, and as you know I do not like drab and dull.  I looked at my box of washi tape and knew just how to decorate those wooden clothes pegs!

wooden clothes pegs and washi tape, what a great idea!

Covered in washi tape pegs are useful and decorativet!


In case you are looking for some lovely washi tape designs at very low prices, I buy most of my washi tape from Chiyogami Designs , they have an ebay store and I have always found them to be reliable and honest sellers, with an amazingly diverse range of washi tape as well as Japanese print origami paper.

After covering the pegs with washi tape, I then put some small brass hooks into the wall, (you could also use removable adhesive ones if you are renting) and attached picture wire, the wire is taut so it can handle weight of the paper without sagging.


Finished storage solution: I can even put my spare fountain pen ink there!
You may have noticed I have a lot of washi tape, and as I said before most of my beautiful washi tapes come from Chiyogami Designs. Where do I store these?
On a trouser hanger of course!

Decorative tape stored on a trouser hanger
I would love to hear your creative storage ideas for organising and decluttering, please feel free to let me know them in the comments!


______________________________________________________________________________ 

About Me: I work full time, I am also studying for a therapist qualification in Naturopathy specialising in Herbalism, I have a small craft 'business', I am co-admin of an auction page on facebook to help other small hobby businesses, i maintain my own 'store' facebook page, I blog at least once a week and I maintain a facebook page created to support small home businesses and hobby sellers 
............................................................................................................... ............................................................................................................... Please visit me on etsy! www.etsy.com/shop/empressbat handcrafted gothic goodies at bargain prices. see me on etsy! www.etsy.com/shop/empressbat ...Please visit me on etsy! www.etsy.com/shop/empressbat handcrafted gothic goodies at bargain prices. see me on etsy! www.etsy.com/shop/empressbat

How do we support cottage industry?


One of my goals for 2014 is to be more active in promoting and supporting cottage industry, small family businesses, arts and crafts, and markets.

I have set up a page on facebook to help me with this goal, the page is called Support Cottage Industry (ironically..)  but trying to get people to help me support them seems to be rather difficult!  I ask them to share to help the page get more fans, to add their links and promotions to the page, but it is like getting blood from a stone.. or like getting chocolate out of my hands...

Many of the people i have invited to use the page to help promote their wares, are the very people who oft complain that nobody supports their handicraft endeavours..yet when i try to support them.. they do not seem motivated enough to help me to help them.

Not all businesses that deserve promotion are on facebook, so on the page i created  I also add information about bricks n mortar stores, places I have been to that are quality home grown amazing stores, to help to promote them.  

To keep cottage industry alive we all need to support them, buy from them, word of mouth promote them. Let us not be the ones five years from now who look with melancholy at a piece of handiwork we bought at a market years ago and say  ... ' of course they dont do craft markets anymore, everything is mass produced these days'.....


............................................................................................................... Please visit me on etsy! www.etsy.com/shop/empressbat handcrafted gothic goodies at bargain prices. see me on etsy! www.etsy.com/shop/empressbat ...Please visit me on etsy! www.etsy.com/shop/empressbat handcrafted gothic goodies at bargain prices. see me on etsy! www.etsy.com/shop/empressbat
Alphabet Challenge: Happily Handmade Handcrafts

Up to H in my alphabet challenge blogs, and today's post is about Happily Handmade items, beautiful things made by clever artists.

Beaded Webs

There is an amazing artisan creating as Beaded Webs, who makes the most delciate and decorative wire and bead creations! Based in Queensland Australia, she works from home and sells from Facebook.

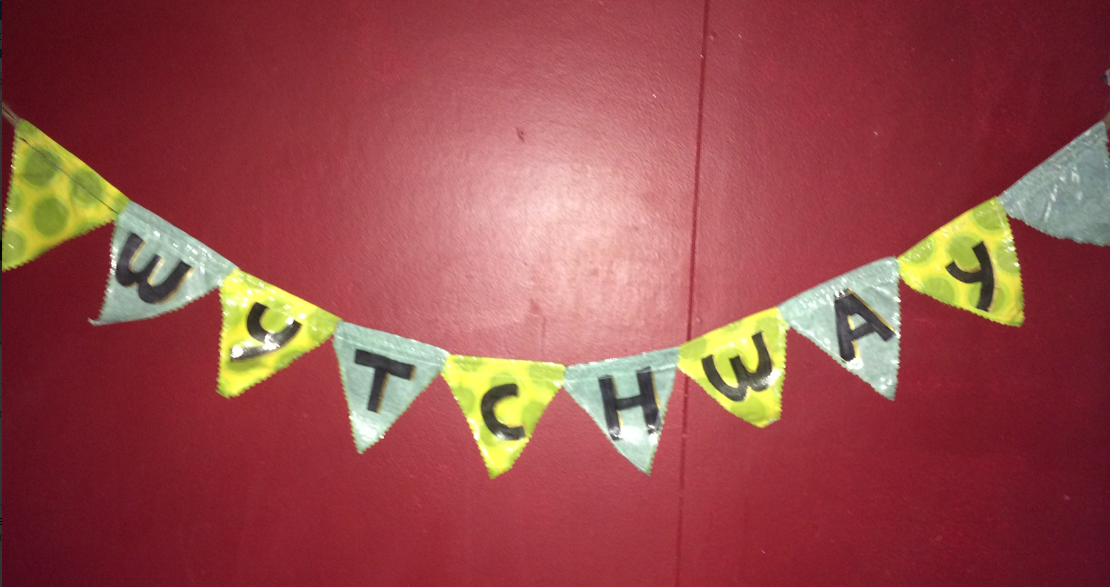
Starting off with wire sculpting and hand beaded web shapes, she has since branched out (excuse the pun) into tree of life shapes, as well as owls, bats, and cars. Her gorgeous bead and wire art is created in a variety of sizes such as large hanging decorations, pendant or keyring sized and medium sized beaded decorations.

I have purchased a purple, as well as a red and black beaded web from her and they are gorgeous! I also have two gorgeous bat beaded decorations that she made to order for me!

Beautifully made, and unique items, her online store is worth a look, and why not buy yourself something beautiful from her today!

Below are some pictures of her great pieces

.


Alphabet challenge: crochet

Blog post brought to you by the letter C as part of my Alphabet blog challenge.


My Mother taught me how to crochet when i was about four years old, i remember making massive metres of chain out of yarn! As i got the hang of the whole crochet thing i started making clothes for my toys and granny squares for cushion covers. I enjoy crocheting and recently made myself a scarf, fingerless gloves, and matching beret out of dark sage green yarn. I don't usually bother with patterns and tend to make things up as i go along, or just use the pattern as a guide.

As well as making my own crochet pieces i like seeing the crochet made by others. There is an amazing textile artist on Etsy, ScarletRabbit, who makes the most delicate elegant fantastic crochet accessories, and i have become a fan of her work, having the honour of owning several of her fingerless gloves and wristlets, many which i have custom ordered.

Ruth, from the etsy store ScarletRabbit, is extremely talented and artistic, as well as crocheting, she draws in pen and ink, and also makes beautiful jewellery.

The fingerless gloves I have purchased from ScarletRabbit are delicate fine crochet created with 100% cotton yarn. The designs are unique, and the crochet is perfect; the lacey crochet design makes these fingerless gloves an absolute delight to see and to wear. I also have a delicate lace crochet and ribbon choker that i bought from ScarletRabbit!

My most recent purchase from ScarletRabbit was a custom order of a pair of purple fingerless gloves and a pair of emerald green. Absolutely beautifully made, they are gorgeous and so comfortable to wear! (see picture of them above)

If you appreciate elegant unique hand made crochet, please visit ScarletRabbit !


Support unique artists: say no to mass produced!!

Dear Batlings,

Today's missive may be nothing more than a feverish rant, but i do believe it has some merit: say no to mass produced tawdry trinkets, and start supporting the artisans who put heart and soul into producing beautiful hand crafted items! We will lose our artisans, the skills to create and the option to obtain unique work if we do not support the hand crafts industry!

  • Mass produced is cheap
  • everyone has one
  • plastic
  • poorly manufactured
  • Land fill
  • Lacking original thought
  • Heartless and soulless
Even those websites advertising themselves as places to buy and sell handmade goods have become prey to sellers offering mass produced, made in timbuctoo, plasticky rubbish!

Personally i love hand crafted things. Unique, quality made, creative items made by those whose joy of imagining and creating shines through the finished product.

I buy many hand crafted things from a variety of artisans from all over the world, and i am the proud owner of such a gorgeous selection of unique accessories as a result of this. I also make a lot of things myself, from jewelery, to clothes, to toys, to bags... I keep some things for myself, i give some away, i sell some.... Beautifully made handcrafted items are rich with the souls of their creators.

  • What happens if we stop supporting handcraft artists?
  • What happens if we want the world Andy Warhol sartired in his famous pop art?
Many artisans rely on the sales of their wares to purchase more raw materials to keep creating wonderous things. Others rely soley on sales to make a living and put food on the table and a roof over their heads. Nothing kills a muse of creativity faster than the stress of not being able to pay the bills!

There is a place for mass produced, yes indeed batlings, it has its place, but not at the expense and ultimate death of hand made quality!

Artisans! Stand up for your rights to be heard and to have a place in the merchandise of the 21st century! Support each other. Motivate each other.

Spread the word that not supporting artisans ultimately means that one day the world will be a sterile plastic environment where nobody recalls how to make anything anymore.

I would really like to hear other's views on this.

Please feel free to post your comments!

<end rant>

Artist Profile: Kim from SassySteampunk

Today's blog is a feature on that amazing Steampunk artisan Kim, from the etsy store Sassysteampunk.

First things first: what is Steampunk?
Becoming popular in the late 1980s, Steampunk is possibly a sub-genre of Cyberpunk and takes inspiration from Sci-Fi, fantasy, parallel histories, and  history meets future. There is an emphasis on steam or clockwork propelled engines, and modernistic inventions with an historical twist. I personally think of it as Jules Verne on Acid..... but I'm a classic goth, what would I know???

Kim of SassySteampunk
Kim hales from Alberta, Canada, her family comprises of two adult daughters, two grandchildren and two dogs. She is a jewellery maker and creates steampunk and goth inspired treasures. She is also a painter and designs tattoos although she states that she has known of her own.....yet.
An avid collector of blue dragonflies, and a fan of horror movies; collects glass orbs and also makes soap; what else inspires our steampunk artisan?
Inspirations
What inspires our Sassy Steampunk Kim?  Kim said that she was initially interested in designing and creating steampunk items  after seeing the video for Ben Lovett's song 'Eye of the Storm'. She has been interested in the steampunk genre for over four years, when initially she sold old watch parts. (think cogs, dials, cases, so cool!)

Kim's sassysteampunk treasures
Batlings, as you know I'm a traditional goth, i am into black lace, lush velvet, bats.... dripping candles ... knee high boots, and opera gloves....so some of you may be surprised, and exclaim in horror as you are overcome in a stupor when I tell you that I am a fan of the etsy shop sassysteampunk

I seriously believe you do not have to be a steampunk aficionado to love her work!  
I have purchased several amazing jewellery items from her, and they are beautifully made unique accessories that are a pleasure and honour to wear! 

One of my fave pieces that I have purchased from Kim's shop is a small ring that comprises  a dismembered watch set on a silver plate ring base and features a crystal as a focal point. I also have a gorgeous dragonfly altered art domino necklace, a beautiful bat cuff and a lovely bat necklace.

Kim is a true artist, as can be seen by her beautifully designed and created pieces, I encourage all of you to take time to browse her shop and buy yourself something delightful from her beautiful wares.


............................................................................................................... Please visit me on etsy! www.etsy.com/shop/empressbat handcrafted gothic goodies at bargain prices. see me on etsy! www.etsy.com/shop/empressbat ...Please visit me on etsy! www.etsy.com/shop/empressbat handcrafted gothic goodies at bargain prices. see me on etsy! www.etsy.com/shop/empressbat

More from the Apothecary of empressbat


Dear Batlings,

I have become obsessed with tiny glass bottles, cork stoppers, and creating olde worlde apothecary labels. (I hope you liked my Antique version of ‘Old World’.. I aim to please)

Yesterday I bottled tiny satin bats to form my bottled bats essence of friendship bottles, today i have bottled a small brass key..the key of Fidelis, elixir of loyalty, and also I have bottled a tiny plastic spider, Bottled Spider Tincture of Happiness… 

Maybe I need to go back to work??

I started cleaning our coffee table today, I found a bottle of glitter I had misplaced,… hmmmm  glitter, resin, and ..some trinket, would look great in an apothecary jar…

Back to bottling found objects, I will check in again later.

In the meantime fiends, don’t be strangers, just be strange!

What to do with watch faces

I bought two working quartz movement watch faces recently, i want to make bands for them so they can be used... however I cannot work out what to use as the bands, or how to make them in  a way that reflects me.

I have seen ones made with beaded memory wire, and some with chains and charms, but I want to do something different and something that reflects me.

I am thinking maybe some velvet ribbon, with bats and spider webs charms sewn in the ribbon.. but i am still working on it

anyone got any ideas?